It's been mooncake season for weeks, if not months now, and the stores have been overflowing with more types of mooncakes than you could shake a stick at (and the packaging gets fancier and fancier every year, although the selection here is still nothing compared to what you can get in Asia!) I, however, have not had a single mooncake (and no, my mooncake-molded fish cookies don't count) yet this year! Which is okay, because I'm not really a fan of the traditional type--too sweet, too oily, and too rich. Fortunately during my food blog browsing, I kept running into photos of the gorgeous, spiralled Teochew style mooncakes and decided I might as well try making my own mooncakes this year! I really liked the instructions at House of Annie's blog, so I went with her recipe, omitting the pandan flavoring. Anyway, enough babbling, on to the process!
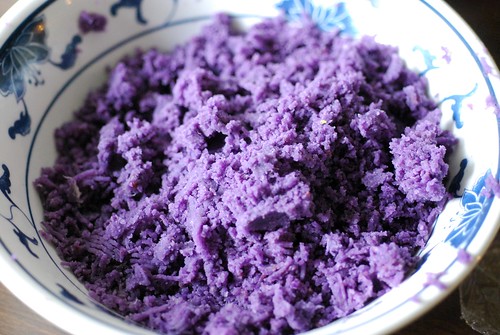
The first thing I did was to make the filling. In this case, I used Okinawan sweet potatoes which I microwaved and then pushed through a sieve (you could use a ricer, or just mash it with a fork) and mixed with butter, a splash of milk, and a bit of sugar. Make sure you taste your filling and adjust because mine definitely needed more sugar. Next time, I might actually mix some condensed milk into this, that sounds pretty delicious actually. And I think steamed and mashed kabocha squash would also be a great filling. Roll into 20 balls and set aside.
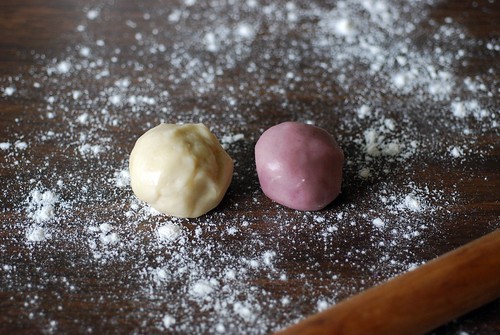
The key to making the flaky, layered pastry is the two different kinds of dough. The un-colored ball of dough on the left is made with butter (and kind of with the techniques you would use to make a pie crust), while the dough on the right is made with oil and simply stirred together. Oh, I used a few drops of food coloring to tint the oil-based dough.
Wrap the oil-based dough in the butter dough, and pinch to seal. Then roll out into a rectangle (or an oblong, if you are incapable of rolling things into rectangles, like me). Then roll it up, like a jelly roll, and turn it 90 degrees:
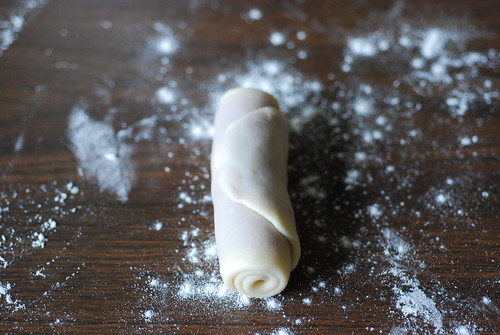
Roll into a rectangle/oblong again.
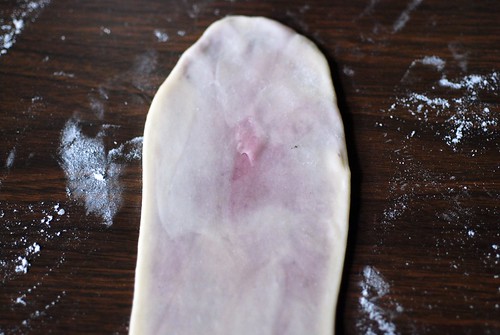
I really like how you can see the colored dough sealed inside. Roll this up again into a jelly roll, and then cut in half.
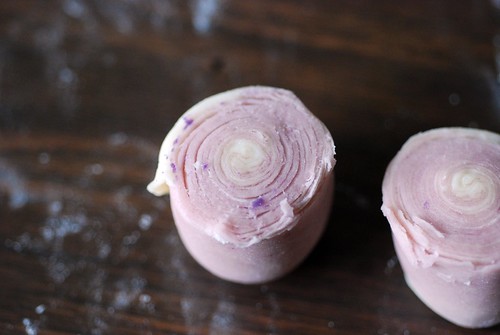
And you'll see this! You can see all the layers that have magically formed. I thought this was really cool! And I don't think it's because I'm easily impressed--this is really kind of like magic, if you ask me! You then flatten and roll this into a round, and if you can, make the edges a bit thinner than the center (like when you are making dumplings!).
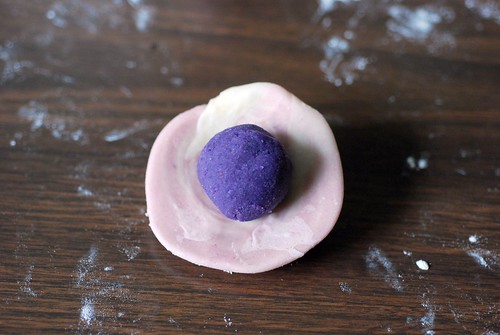
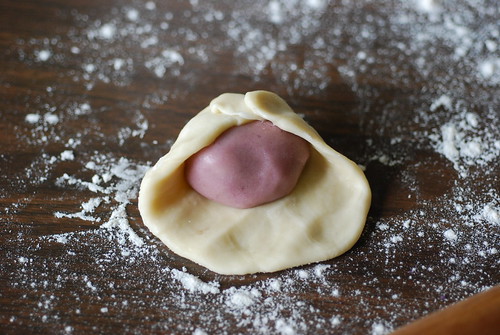
Flip the round over, and put a ball of filling in the center, then gather and pinch the edges to seal. I found the dough a bit stiff and had problems getting it to stick together occasionally, but that was easily fixed with a dab of water to moisten the dough.
This is what you'll end up with. You'll be able to see the rings/layers of pastry, and this dough seems to be able to stand up a fair amount of handling, so it's not quite as fiddly as I would have expected. Repeat with the remaining dough, and place your shaped mooncakes on a parchment lined baking sheet. They'll need to be baked at 350F for about 30 minutes, or until set and lightly browned on the bottom.

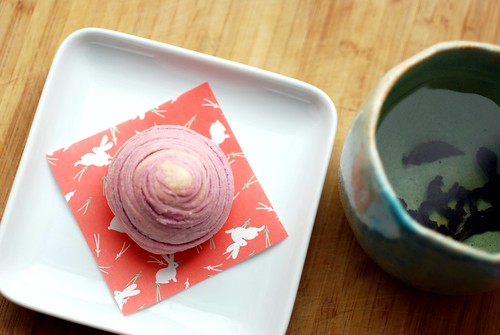
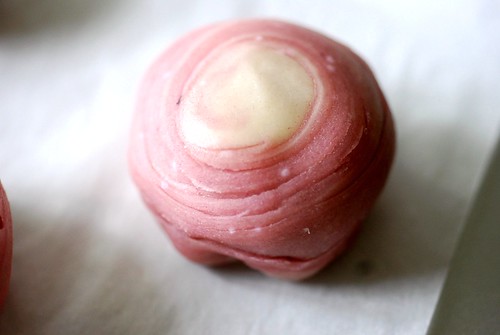
After baking, the layers will separate a bit so that they're more defined. Isn't it gorgeous? I am best pleased, even if the filling isn't sweet enough!

I will leave you with a shot of the innards--I'm so happy that the sweet potato kept its purple color. Can't wait until tomorrow night when I can hang my head out of my apartment window and hopefully gaze at the moon while I munch on one of these!
9 comments:
It is quite a beautiful mooncake, and I'm happy you were able to get real Okinawan sweet potato for the filling.
Great job, and thanks for the mention!
Beautiful! Now I know how to make Teochew style mooncakes! Have to try making it first though :D
I have the same feeling when I cut through the dough to reveal the magical layers that form too! It's like magic isn't it? :D And Happy MidAutumn Festival to you too :D
I love the colours of the pastry and its layers! I have never made a baked version of this pastry but I made a deep fried version before. I would love to try a baked recipe.
Nate & Annie--Thanks so much for posting such clear instructions! It made the pastry part soooo much easier :D I can't wait to experiment with other flavors!
Jun you should definitely try it! It's easier than it seems :D
Hi Janine! Hope you had a nice Mid-Autumn Festival :) The pastry is TOTALLY like magic. I may have been jumping up and down a little...and run around the house to show everyone, hehe.
Hi Betty--ooh, deep fried? I bet that would be even more amazing (what isn't improved by frying?).
Love love this post! You did such a great job! Your satumaimo is so beautiful! And I love the pink of the pastry.
BTW could you see the full moon? I couldn't due to the weather that night. But I would have been so happy if I'd had one of those cakes hehe.
Hi! I love your mooncakes, so neat! I actually followed Annie's recipe too and use purple sweet potatoes like you did!
gorgeous!
Amanda
softandstiffpeaks.blogspot.com
Hey Babykins :D I could see the full moon, yes! It was finally clear out and nice. But I was busier eating mooncake than looking at the moon...:D
Jeannie, wasn't it fun making these? I still think forming the layers is like magic :D
Amanda, thanks! You've got to try this pastry out, it's soooo cool to make!!
Post a Comment