Showing posts with label chocolate. Show all posts

Monday, March 28, 2011

world peace cookies

Gift-wrapped

I've been on a baking spree lately (well, it FEELS like a spree!)--it's still pretty cold here in NYC (that one 70 degree day was such a tease) so it's nice to have the extra warmth generated by the oven. Fortunately most of the baking I'm doing is for other people, or else I would soon not be able to fit out of my door....

Boxed

I'm always looking out for new packaging ideas (you should see my enormous collection of ribbons, thanks to my designer-friend) and I spotted these paper baking pans when I was at Daiso in February. They're meant to be single-use bakers, and they work very well for that purpose, but they're also great to use for packaging, and these cookies happened to fit perfectly. I just wrapped them with parchment and tied it off with some hot pink ribbon--prettier than plastic wrap, but still very simple.

melty choco

But enough about the packaging, let's talk about the cookies! This is from Dorie Greenspan's Baking , and according to the note that accompanies the recipe, they were renamed World Peace Cookies because Dorie's neighbor was convinced that these cookies are all you need to ensure peace. Well, I actually disagree--if there was one cookie left and you and I were both staring at it...well, I don't know about you, but I'm pretty sure things would end badly.

World Peace Cookies

Fortunately, this time there are plenty to go around. Maybe that's the real secret--always keep a supply of cookies on hand.

If you don't have a copy of Baking (gasp! go get one! you need it!), the recipe can also be found here.

Wednesday, March 23, 2011

Review: King Arthur Flour Jacques Torres Mudslide Cookie Mix

DSC_0150

Phew, the name of this mix is quite a mouthful huh? Well, I suppose I'm lucky enough to have a Jacques Torres location nearby (I try not to pass by too often, the temptation is too great!) so if I really want one of his awesome cookies, I could just walk in to the shop. But if you don't live nearby, then I would say this mix is a pretty handy thing to have on hand. This was one of the items from the gift basket I won at the Girls Club bakeoff back in December. I felt like baking something up over the weekend but discovered to my horror that I was out of sugar! Me! I don't know how on earth this could happen! Anyhow, so, this mix allowed me to indulge in some baking without actually having to go out to buy sugar (yes, yes, I know, extremely lazy of me...)

DSC_0111

So this is what actually comes in the box--two 7 oz packs of chocolate discs, and a baggie of the actual cookie mix itself (which has bits of walnuts in it). It's pretty simple to put together, and the only additional ingredients you need are two tablespoons of butter and two large eggs. So here we go!

DSC_0130

Step 1, melt the butter and one packet of the chocolate discs together. Appreciate the fantastic smell of butter and chocolate. And the shiny!

DSC_0137

Step 2, stir in the cookie mix. This batter stirs up very easily, so I just used a spatula...I don't think you need to break out an electric mixer at all.

DSC_0140

Step 3, stir in 2 eggs, one at a time.

DSC_0143

Step 4, stir in the other packet of chocolate discs.

DSC_0144

Step 5, scoop out 1/4 cup portions of dough (these are big cookies, so give them plenty of space!), let sit for 10 minutes, and then bake in a 350 oven for about 13 minutes. When done, the cookies will be set around the edges, and soft in the center (actually, they'll seem totally under-baked), so you have to let them cool on the pan. This way, they'll be soft and chewy.

DSC_0149

Step 6, eat! Oh, you want to see another picture?

DSC_0148

If that pool of melted chocolate doesn't convince you, I don't know what will!

DSC_0152

Try to make sure you have a glass of milk on hand, because holy cow, these cookies are soooooo rich. Too rich for me, actually, and I only managed half of a cookie. (Don't worry, the other half has been earmarked for breakfast tomorrow...).

The mix retails for $12.95 on the King Arthur website, which is a bit steep for a mix, but the cookies retail for around $2.50 apiece, so actually the mix isn't a bad deal (the pack makes 10 cookies). If I didn't bake regularly, I think I'd keep a box of this on hand for emergencies--and certainly if you don't live in the NYC area and want to taste a Jacques Torres style cookie, this is a pretty good option!

Saturday, January 15, 2011

Domokun Cookies

Domo!

So, how is 2011 treating everyone? So far, it's been pretty snowy here and now it's also freaking freezing (and unusually cold in my apartment, time to call the super AGAIN), but otherwise, it's not been a bad start. For one thing, I am sticking to my resolution to eat more veggies, and I've even managed to start packing lunch again (well, except those days where I hit the "off" button instead of "snooze" on my alarm clock). And it's a long weekend, woo! So it's a perfect opportunity to do some baking. I don't know about you, but I have this problem where every time I browse foodblogs, I end up craving pretty much everything I see. I've got a list of recipes bookmarked that could probably keep me busy for an entire year. But somehow, things like Domokun cookies seem to go straight to the top of the list. By the way, please go to Diamonds for Dessert for the original (and excellent) tutorial, because her cookies look at least 1000 times better than mine do. That's what happens when you are too lazy to actually find a ruler!

Faceless!

This is really the first day I've worked with making patterns in cookie dough, and I learned that yes, you really do have to measure and make everything neat and straight, or else it comes out all wonky. Oh well, for a first try, I think they are okay! Of course, the proportions are wrong and next time I'll have to make sure I make the red portion smaller. These are just gonna be extra loud-mouthed Domokuns ;)

Piping practice

You can also see that my piping skills leave something to be desired. Ahem. (Might try royal icing next time, white chocolate is a bit temperamental.)

giant mouthed domokun

But I think this one is my best one (which is not saying much, haha). Yes little Domokun...it makes me happy to look at you. Now I have to go buy some milk so I can eat a few (don't tell them!).

Monday, April 26, 2010

Schoggibroetli

DSC_0336

A few years ago, I had the opportunity to spend fairly lengthy periods of time in Switzerland. I really enjoyed the trips I took there, I mean, what's not to like? Hiking? Mountains? Beautiful old towns everywhere you look? Chocolate?? Need I say more? There was also the Linde, near the Mister's apartment, where we drank many a seasonal beer (my favorite? The fruehlingsbier! Yum.) and had toooo few plates of apfelkuechlein. Oh my gosh, that was the best dessert ever. Wait, I have to show it to you:

P1010995

Not a great photo, but mmmm. Apple rings, battered, fried, covered in cinnamon sugar, and served with ice cream? YES, PLEASE. Whoops, I'm getting sidetracked here! One of the other nice things about his place was Hausamann, an awesome bakery/cafe. It's right by the tram stop which means it's great for running in and grabbing a quick snack, but I always enjoyed perusing the racks of treats, and trying out my really, really rudimentary German on the ladies there. (And by try out, I mean, I was thrilled when I bought a Kartoffelbrot, and they understood me. Of course, they then asked me something else which I could not for the life of me understand. I think I realized like, 2 years later, that they had asked me if I wanted it sliced.) They have a nice little seating area inside, if you want a coffee and some cake, but I particularly liked their sandwiches (like the Fischli! A fish shaped fish sandwich? Yum.) and learned to buy one to take on the plane back to the States. (Don't ever ever eat the chicken "cordon bleu" on Continental. Trust me.) Another thing that I loved there? The Schoggibroetli! It's basically a soft, sweet bun studded with bits of chocolate and sugar chunks, and I have been craving them lately. Of course, there are no Schoggibroetlis to be found, so I had to try my hand at making them myself.

DSC_0328

I started with a basic sweet yeast dough, let it rise once, and then kneaded in some finely chopped chocolate and a handful of pearl sugar, then set it aside to rise again.

DSC_0329

This is how it looked after about an hour; good rising! I love the way yeast dough smells. After the second rise, I formed the dough into buns, and left it to rise for a 3rd time. Actually I think that was probably overkill, and you could probably just mix the chocolate in during the first rise, and the second rise will be after you form the buns.

DSC_0332

Just before baking, brush the buns with butter and sprinkle more pearl sugar on top. Pearl sugar is great! It doesn't melt, looks pretty, and adds a nice crunch, and when you actually fold it into dough, you get little pockets of sugar. Yummmmmy.

DSC_0337

20 minutes later? Schoggibroetli! Looks good? I can tell you they SMELLED great.

Schoggiebroetli, take 1

Tasted great, too! Actually, I must pat myself on the back--these are pretty close to the Schoggibroetlis I remember. I would just switch up the chocolate and use one that was slightly less bitter next time (maybe 60% instead of 72%). Also, I would be more careful and knead the chocolate in more evenly. But oh, these do take me back....now I want to take another trip to Zurich. Besides, there are those lovely Luxemburgerlis waiting for me....

What's your favorite food memory from a trip? Tell me :)

Schoggibroetli (Swiss Chocolate Buns)
2 3/4 cup bread flour
2 teaspoons instant yeast (or one envelope)
1/3 cup granulated sugar
1/2 teaspoon salt
1/2 cup warm water
1/4 cup warm milk
1 egg
2 tablespoons butter, softened (plus another tablespoon, melted for brushing the buns)
about 1/2 cup of chocolate chips, or finely chopped chocolate from a bar (or to taste)
1/4 cup of pearl sugar, plus more for the top of the buns

Combine flour, yeast, sugar, and salt, and whisk briefly to combine. Add the water, milk, and egg, mix until a dough starts to form. This is easiest in a mixer, but can also be done easily by hand. Just prepare to get messy! Knead the butter in until thoroughly incorporated, then turn out onto a lightly floured countertop and knead until the dough is smooth and no longer sticky. Pat the dough out into a rough square, and sprinkle the chocolate chips and pearl sugar evenly over the surface. Roll up, and knead again briefly, just to make sure all of the chips and sugar are incorporated into the dough. Place in a greased bowl, cover, and let rise until doubled (1-2 hours, depending on how warm the room is).

When the dough is risen, deflate it, and form 18 evenly sized buns. Arrange on a parchment lined baking sheet, leaving about an inch and a half between each bun, and cover with a damp tea towel. Allow to rise until puffy and almost doubled, which should take about 40 minutes to an hour. Preheat oven to 350 F. Melt a tablespoon of butter and brush the tops of the buns, then sprinkle a bit of additional pearl sugar on. Bake for 20-25 minutes, or until the buns are nicely browned top and bottom. Remove to a rack to cool; they are most delicious when they are still slightly warm, but are also good microwaved for 15 seconds or so.

Monday, April 12, 2010

Jacques Torres' Chocolate Chip Cookies

Giant Cookie

Okay, seriously--who doesn't love chocolate chip cookies? I know, I know--there's some disagreements over the STYLE of the chocolate chip cookie (chewy vs. crispy, thin vs. puffy, more chocolate chips, fewer chocolate chips). Personally, I like mine on the thinner side, crisp on the edges, chewy in the center, and chocolatey (obviously) but not TOO chocolatey. I want to taste the butter and flavor of the dough (vanilla, salt), too! And having sampled more than a few chocolate chip cookies in my time (a few too many, no doubt), I feel well qualified to judge a recipe. Enter the Jacques Torres chocolate chip cookie recipe! A few years ago, this was published in the New York Times along with an accompanying article about the search for the perfect chocolate chip cookie. That's my kind of quest, so I saved the recipe and promptly forgot about it, until a few weeks ago, when I was in Jacques Torres' chocolate shop (buying some chocolates as a gift) and saw a tray of his cookies. Now, I'd eaten one before, made into a ridiculously indulgent and over the top ice cream sandwich but seeing (and smelling) them again reminded me of this recipe that had been sitting here neglected. So in addition to the chocolates (well received, by the way) I picked up a bag of 60% chocolate discs.

Choco discs

This recipe is a bit different from the standard recipe you find on the back of bags of chocolate chips; for starters, you use chocolate discs instead of chips. This creates pockets, almost layers of chocolate in the middle of the cookie. If you can't find discs (Valrhona also sells them), then I would substitute some really good quality bars of chocolate, cut into big chunks. The dough also uses a combination of bread and cake flours, instead of all purpose, and you rest the dough at least overnight before baking, for proper hydration. Otherwise, the technique is pretty standard and straightforward.

Cookie Dough

The recipe, as written, calls for scoops of dough weighing 3.5 ounces. See the nickel for scale. This is one big ball of dough, and I could only fit three of these on my baking pan. This resulted in a cookie that was about 6 inches across--enormous! The top photo should give you some sense of scale about how HUUUGE the cookies were. Way too big for my taste, although it certainly was delicious. So the rest of the dough I shaped into 2.5 ounce balls, which still made a good sized cookie, but more manageable. At least, I don't feel horrible guilt for eating a whole cookie by myself ;)

Baked cookies

See? The 2.5 ounce cookies are about 4 inches across. Aren't they gorgeous looking? And the chocolate discs really do create these glorious pools of chocolate to bite into. Some people might actually consider these to have too much chocolate (I felt that way about the first one I ate) but that is easily solved either by cutting down the amount of chocolate, or, to be really indulgent, eating a cookie with a scoop of vanilla ice cream. Oh! And I almost forgot--the recipe calls for a sprinkle of sea salt over the top before baking. I forgot to salt my first pan of cookies, and it really makes a difference, so be sure you don't forget it. I have another 30 balls of dough in my freezer....who wants to come over and have a cookie party?

Jacques Torres' Chocolate Chip Cookies
2 cups minus 2 tablespoons (8 1/2 ounces) cake flour
1 2/3 cups (8 1/2 ounces) bread flour
1 1/4 teaspoons baking soda
1 1/2 teaspoons baking powder
1 1/2 teaspoons coarse salt (I used sea salt)
2 1/2 sticks (1 1/4 cups) unsalted butter
1 1/4 cups (10 ounces) light brown sugar
1 cup plus 2 tablespoons (8 ounces) granulated sugar
2 large eggs
2 teaspoons natural vanilla extract
1 1/4 pounds bittersweet chocolate disks
Sea salt.

Sift dry ingredients together and set aside. In a medium bowl, cream together the butter and sugars (I used a hand mixer) until very light, about 5 minutes. Add eggs one at a time, beating well before adding the next. Add the vanilla. On low speed, gradually add the flour mixture and mix just until combined. Stir the chocolate discs in by hand, making sure you don't break them up. Cover with plastic wrap (or scrape into a plastic bag) and refrigerate for at least 24 hours.

When ready to bake, preheat oven to 350 degrees. Line a baking sheet with parchment paper. Make 2.5 ounce balls of dough (about the size of ping pong balls--the original calls for 3.5 ounce balls of dough, which are bigger than golf balls) and place on baking sheet; I would recommend no more than 4 cookies at a time. You need to give them plenty of room to spread out, although obviously you can adjust if you have a larger or smaller sheet. Sprinkle lightly with sea salt and bake until golden brown but still soft, 15 to 18 minutes. Transfer sheet to a wire rack for 10 minutes, then slip cookies onto another rack to cool a bit more. Repeat with remaining dough.

Makes about 30 4" cookies, about 18 5 or 6inchers if you follow the original sizing.

Wednesday, March 24, 2010

Caramel Filled Chocolate Cookies

Caramel filled chocolate cookies

I know, you are thinking "Man, these sure are some plain and boring looking chocolate cookies." I thought so too. I mean, I've complained about this before but it's hard (for me) to photograph anything chocolate because it's just brown! But fear not, they may be plain Janes on the outside, but inside is a different story...

Stretchy Caramel Yum

Oh yeah, that's right. Molten, stretchy caramel, baby. Still think it's plain?? And what kind of fussy method do we use to put caramel in the cookies?

Haha. Actually, these are super easy to put together; it's just a crinkle cookie wrapped around a Rolo (for those of you unfamiliar with them, they are chocolate covered caramel candies). The only fiddly bit is unwrapping all them darned Rolos and resisting the urge to eat too many of them. The good news is, you need 48, and your average bag of Rolos has about 55. Yes, I counted. But what did I make these for? Here's a clue:

A Band of Brave Warriors

Can you guess? I'll just say it was a nerd-tastic weekend involving all kinds of yummy food, Mountain Dew, and lots of laughing. And, of course, cookies.

Caramel Filled Cookies, adapted from Culinary in the Desert
1 1/2 cups all purpose flour
1 cup whole wheat flour (preferably white whole wheat)
3/4 cup unsweetened cocoa (my favorite is King Arthur's Double Dutch)
1 tsp baking soda
1/2 tsp salt
2 sticks butter, softened
1 cup white sugar
1 cup light brown sugar, packed
2 large eggs, room temperature
2 tsp vanilla
48 Rolos (or substitute peanut butter cups or plain caramels)

Sift together the flours, cocoa, baking soda, and salt in a small bow. Set aside.

Combine the butter and sugars, beat until smooth and creamy, about 2 minutes. Add the eggs one at a time, incorporating the first before adding the second. Stir in the vanilla. Add the flour mixture and stir just until incorporated (I recommend doing this by hand with a big wooden spoon; the dough is pretty soft so it shouldn't be too hard on your arms). Scrape dough into a plastic bag and chill for at least 2 hours.

When you are ready to bake, preheat the oven to 350 F. Divide the dough into quarters, and work with one section at a time. Divide a quarter into 12 equal pieces of dough and roll into balls. Make sure you have unwrapped all the foil from your Rolos! Seriously!! Poke a hole in the center of each dough ball and insert a Rolo; shape the dough around the candy so that it is completely covered, and then roll between your palms back into a ball. Dip the top of each cookie in additional granulated sugar, if desired, and place on a parchment lined baking sheet, sugared side up. Repeat with remaining dough. Bake until the tops are firm and cookies are set, approximately 12 minutes. If you feel like the cookies are a bit too puffy looking you can press them down a bit right after they come out of the oven, but don't push too hard! You don't want to squish the caramel out. Let sit on the pan for a few minutes, and then transfer to a rack to cool completely.

Makes 48 delicious cookies that will keep you powered up on your next quest. Serve with milk. Or coffee. Or tea. Or Mountain Dew...I won't judge.

Monday, March 15, 2010

Madeleines

DSC_0755

The madeleine, one of baking's enigmas. Is it a cake? Is it a cookie? Is it the mutant offspring of a cake and cookie who got together and made sweet, sweet love?

Haha, okay, enough of that. The madeleine is actually made with what amounts to a cake batter, but is baked in shell-shaped molds so that you get individual, totally addictive little morsels that get a bit crispy and cookie-like on the edges. It's the best of both worlds, in my opinion. (My opinion may be swayed by the fact that I am currently munching on the rejects--cook's treat!) And even more so when they are MINI madeleines.

DSC_0731

The easiest way to fill madeleine pans is with a piping bag--that way you can just squeeze the right amount into the impressions rather than messing around with pushing the batter off a spoon or whatever. If you don't have a piping bag, just put your batter into a ziploc bag and cut the corner off. Since this batter rests overnight, I just scraped it into bags and left them in the fridge to chill.

DSC_0734

Don't worry too much about spreading the batter out; even though it'll be chilled and stiff, it'll smooth itself out like in the photo above. As you can see, I've filled the molds almost to the rim. Also! I highly highly recommend that even if you have non-stick pans that you still butter and flour them. You will thank me later when you suddenly discover that one of your non-stick pans has mysteriously become a stick pan.

Pile of madeleines

Now what's better than a pile of mini madeleines? These happen to be Earl Grey flavored, and you haven't smelled delicious until you have steeped Earl Grey tea in butter. I wonder if that's what Morrissey had in mind when he sang about sharing greased tea (anytime Morrissey, just give me a call).

DSC_0742

Oh wait, maybe this is better--add chocolate to the mix!

DSC_0747

From left to right, Earl Grey, chocolate, and traditional. For some reason, the traditional ones turned out very strangely and bubbly (I mean, there were a LOT of air bubbles in the finished madeleines and no humps) and um, ugly. So, those became the bits that I nibbled on, and the much better looking Earl Grey and chocolate ones were packed up and sent on their merry way (their destination being brunch at Fair Folks and a Goat--go see their site, and then make an appointment to visit!)

:Updated on 3/17/10 to include recipe!:

Earl Grey Madeleines (by way of the Washington Post, adapted from Dorie Greenspan)
5 tablespoons unsalted butter, plus more for the pans
2 tablespoons loose Earl Grey tea
3/4 cup flour
1/2 teaspoon baking powder
Pinch salt
1/3 cup sugar
Finely grated zest of 1/2 lemon
2 large eggs, at room temperature
2 tablespoons honey
2 teaspoons vanilla extract

Melt the butter in a small saucepan over low heat or in a microwave oven. Add the tea and allow it to infuse for 15 minutes. Strain and set aside.

Whisk together the flour, baking powder and salt.

Place the sugar and lemon zest in the bowl of a stand mixer or another large bowl and, using your fingertips, work the zest into the sugar until the mixture is fragrant. Add the eggs. Using the stand mixer or an electric hand mixer, beat the eggs, sugar and zest for 2 to 3 minutes, until pale and thick. Add the honey and vanilla extract and beat for 1 minute. Switch to a rubber spatula and gently fold in the dry ingredients. When they are incorporated, fold in the butter. Press a piece of plastic wrap against the surface of the batter and refrigerate for at least 3 hours, or for up to 2 days.

When you're ready to bake, center a rack in the oven; preheat to 400 degrees. Lightly grease 12 full-size madeleine molds, dust the insides with flour and tap out the excess. [Even if you have non stick pans, you should do this in case you end up like me with a pan that has mysteriously lost its non stick abilities. If you are making mini madeleines, just make sure you regrease and flour the pan between batches.] Place the pan on a baking sheet. Pipe or spoon batter into the mold(s), until almost full. Bake for 10 minutes, or until the madeleines are golden and the tops spring back when touched. Remove the pan from the oven and release the madeleines from the mold by rapping the edge of the pan against the counter. Transfer the cookies to a wire rack to cool to just-warm or room temperature.

Makes 12 regular sized madeleines, or something like 40 mini ones.

Friday, December 4, 2009

Chocolate-chocolate Cupcakes

Starry Cupcakes

Birthday baking is the best kind of baking, in my opinion. But maybe I like it because it gives me an excuse to make something? At any rate--yay birthdays!

DSC_1456

Sugar star sprinkles may not be as elegant as silver dragees or sugar pearls, but they are undeniably festive looking and colorful! I feel a bit more cheerful just looking at this photo. This was my first time making the chocolate-chocolate cupcakes from Dorie Greenspan's Baking From My Home To Yours (my go-to!). I'm on a bit of a hunt for the perfect chocolate cupcake recipe, and the problem lies in the fact that I want something that is light but not spongy. Most recipes I've tried either fall into the very airy or the dense (like poundcake) camps. So far, the frontrunner is still the Old Fashioned Chocolate Cupcake recipe from Chockylit's Cupcake Bakeshop. But I have to give these a second try. Do you want to see what the frosting is hiding?

Naked cupcake

Is weird looking, right? Kind of like an all chocolate version of the popular self-frosting nutella cupcake? That is because I am a dummy! The recipe calls for both cocoa and melted chocolate in the batter, so I dutifully melted some nice 70% chocolate and left it on the counter to cool...where it stayed until I had already put the tray of cupcakes in the oven. Frickinfrackin!#$!!#$!#%!# So I tried to stir the chocolate into the already portioned cupcakes--unsuccessfully as you can see. But actually the cupcakes were pretty good, even with the screw up, and I bet they would be even better if I had made them right. So, next time. The glaze is definitely a keeper, though!

So, I just looked at my calendar and realized how close we are to Christmas--eep! Where did the time go! I'm going to have to start making batches of dough and freezing them this weekend!

Monday, July 13, 2009

Has anyone seen my baking-fu?

DSC_0690


I think I am in a serious post-vacation rut. It's been really hard to get back into the swing of work (which I guess might be a sign of burnout) and generally speaking, I feel kind of...blah. I'm actually pretty busy but I sort of wish I could just curl up and hibernate for a while.

The blahness has even extended to my baking. I am just not feeling very excited about it. For starters, it's too hot now to turn the oven on much--one of the big downsides to our apartment is that turning the oven on heats the whole place. So, I either have to wait for a cooler day or do my baking early in the morning or late at night. The net result is that I am just not baking very much.

DSC_0693

So it's super frustrating that I DID actually have plans to make some little desserts to bring to a party and it was just a big giant pile of fail. The plan was to make mini raspberry cream chocolate tarts, and at first everything seemed to be going fine--the pastry cream and tart dough both came together very quickly and all I really had to do to finish was to blind bake the tart cases and fold raspberries into the pastry cream. I made the tart cases in my mini-muffin pan (shocking) and they seemed to bake up just fine, with none of the shrinking or cracking that I sometimes get....but the shells, when cool, were SUPER fragile. But since they were meant as single bite desserts, I thought that perhaps this would not be a big problem.

Then I retrieved my pastry cream and it had chilled into a solid mass! I mean, really solid. Like, play-doh solid. I ran the immersion blender through it, which loosened it up (especially once I added the raspberry puree) but...it was a little lumpy and not silky smooth like pastry cream usually is. Sigh. But okay, I can pretend the lumps are raspberry seeds. So, I put together a test tart with a spoonful of cream and a raspberry on top and presented it to Sir Didymus...and as soon as he took it, it fell apart in his hand (and all over the floor). GRRR!!!! Well, at least they look nice in the photos and they taste okay.

So, to cut this already too-long tale short, I left the desserts at home and we bought a bottle of sake instead. Phooey. And now I have shattery tart shells and lumpy pastry cream languishing in my fridge. Suggestions for using them up would be MUCH appreciated!

(I'm not going to share the recipes here since they did not produce very good results for me. I mean, it was probably my fault but I want to tweak them...if I ever dare make this again.)

Monday, May 11, 2009

Tintin and the Giant Brownie

Giant Dessert Land?!

In the Tintin story, "The Shooting Star," Tintin ends up on meteorite island which makes everything grow super large....giant mushrooms, giant spiders, EEK. Well if he had had giant brownies, maybe he would have tried to set up camp. Especially if he also had a giant bottle of milk. (Snowy is probably wondering where his giant bone and giant whiskey are.)

Noooo I'm just kidding. It's just that chocolate baked items are hard to photograph in an interesting way (I mean, they're just BROWN), so I figured I would recruit some of the toys we have sitting around the place. Actually, the brownies were baked in mini-muffin pans, and that milk bottle is a mini milk bottle that a pudding I got at a Japanese market came in...it's about 3 inches tall, to give you some perspective!

DSC_0218

This is my current favorite brownie recipe, and it's pretty standard except that you melt your butter and then cook it with the sugar before blending it with other ingredients. This is supposed to help give your brownies a shiny crust, although I've never managed to get that sort of crackly crust on the top. I bake them in mini muffin pans because I really like the edges of brownies the best...and I also can't find my square one. Oh well!

Fudge brownies
from King Arthur Flour
8 tablespoons of butter
1 cup of sugar
2 large eggs
5/8 cup unsweetened cocoa, dutch-process
1/2 teaspoon salt
1/2 teaspoon baking powder
1 teaspoon instant espresso
1.5 tablespoons vanilla
3/4 cup all purpose flour, sifted

Preheat the oven to 350 F and grease an 8x8" pan, or a mini muffin tin (this recipe makes 24). Melt the butter in a saucepan, then stir in the sugar. Return the pan to the heat and stir until hot and shiny, but not bubbling or boiling. Remove from the heat and set aside. Combine the eggs, cocoa, salt, baking powder, espresso, and vanilla in a medium bowl and stir until combined and smooth. Stir in the butter and sugar mixture until smooth, then stir the flour in. You will have a fairly thick batter, but it should be of a dropping consistency. Pour into your pan or scoop into muffin tins. Bake for about 30 minutes for the pan, and about 15 for the muffin tins, until set, and a skewer inserted comes out with a few moist crumbs. Let cool on a rack, then enjoy with a glass of milk...or tea...or coffee......or just by itself.

Sunday, May 3, 2009

Chocolate Financiers for a Birthday Boy

DSC_0208

A friend of mine just turned 40, and had I planned further ahead, I would have made a version of his favorite Entenmann's chocolate marshmallow cake. But um, I've never had an Entenmann's chocolate marshmallow cake and the Duane Reade by me had none so I couldn't try it to duplicate it.

But actually it's probably better; I don't know if I would have been able to live up to Entenmann's. :)

DSC_0203

Instead, I made up a batch of chocolate financiers, using a variation on this recipe. Basically I added 2 tablespoons of unsweetened cocoa powder (my favorite is the Double Dutch Dark Cocoa from the Baker's Catalogue) and 2 teaspoons of espresso powder to the basic recipe. I sprinkled some of them with cocoa nibs and put chocolate buttons in the center of the others. I always kind of think that chocolate baked goods are pretty boring looking if they don't have frosting or something like that, so powdered sugar to the rescue! (Also, cocoa nibs--so yummy.)

Well, happy birthday T-san! You weren't supposed to eat them all in one sitting, but I'll take that as a compliment...and maybe I'll make you some more in exchange for macarons from LA. :)

Sunday, March 1, 2009

Green tea ice cream

DSC_0036,


In baking, sometimes even a disaster can still have a happy ending. I was going to turn those horribly ugly cupcakes into cake crumbs for future use, but it just so happened that last week I tried a recipe for homemade green tea ice cream...and then I promptly forgot about it in the freezer. (Forgetting things is a seriously bad habit of mine.) But actually, it's good that I forgot about it, because now I can have (trimmed up) chocolate cake and green tea ice cream. Hey, all right!

This recipe is from Elizabeth Andoh's Japanese cookbook, Washoku; it's a really terrific resource for homestyle Japanese recipes. It is about as simple as you can get for ice cream (no need for an ice cream maker!) and as long as you have good quality tea, it's really delicious. It's not as creamy as the ice cream I buy, but I also suspect that it's a lot less caloric. And if you are more diligent about whipping it than I was, it'll be smoother.

Green Tea Ice Cream
1/3 cup sugar
1/3 cup water
1/2 teaspoon mirin
2 teaspoons matcha
1/2 cup whole milk
1/2 cup half-and-half

In a small saucepan, combine the sugar and water. Stir the mixture over low heat to melt the sugar and continue to simmer for about 5 minutes, or until syrupy. Add the mirin (which I omitted), stir, and remove the pan from the heat. In a small bowl, combine 1 tablespoon of the warm syrup and matcha and stir until dissolved. Return this sweet tea concentrate to the saucepan and stir until completely blended. To retain optimal aroma and ensure an intense jade color, do not reheat the mixture. Stir in the milk and half-and-half and mix thoroughly.

Pour the tea and milk mixture into a flat, shallow, freezer-safe container. Tap the container gently on a countertop to force out any air bubbles. Cover and freeze for 1 1/2 hours or until nearly firm. With a handheld mixer, whip the mixture vigorously in a deep bowl. Return the mixture to the same container, re-cover, and freeze again for another 45 minutes, or until firm throughout. Repeat the whipping step one more time to achieve a silkier texture. Makes about 1 pint (unless you keep tasting it).

Saturday, January 3, 2009

Knee-deep in macarons

DSC_0130


Happy new year, everyone! I don't know about you, but my resolution this year is to be more regular about blogging. I currently have about 7 drafts sitting in my queue from the end of 2008, so...enough babbling and onwards!

A couple of weeks ago, someone asked me what my "desert island" foods would be--my list went something like pho, tofu, pork chops, cookies (I know, that's cheating), and macarons. So you can imagine my happiness when I got not one but two gifts of macarons!

P1020873

First was this box of chocolate and caramel macarons from Paulette that my coworker Amy carried back from LA for me (also see the top photo). I've been looking for a caramel macaron comparable to the one I had from Laduree since our trip to Paris, and although Paulette's comes close, it's still not quite the same. This is not to say it's not delicious, of course! It was my favorite, and though I gave away a few of the chocolate ones, I hoarded all the caramel ones for myself (shhhh).

P1020888

My second dose of macarons in as many weeks came as a gift from two lovely friends, Tenebrous Kate and the Baron. These are from La Maison du Chocolat, which I blogged about previously. I have to admit, I get kind of a thrill when I see the packaging; yes, I'm still a sucker for nice packaging.

In comparison to the Paulette macarons, La Maison du Chocolat's are significantly larger (about 3" across, I would estimate). I'm not sure what all of the flavors were, but chocolate and raspberry were the predominant flavors I got.

P1020891

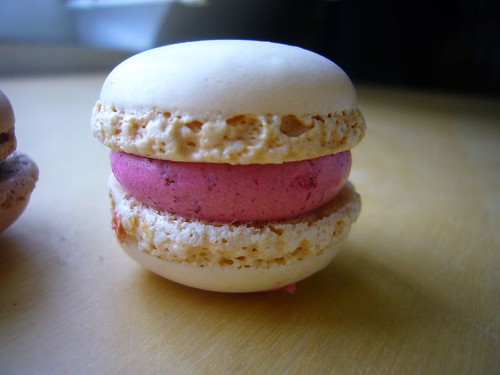
And inside a chocolate macaron. To me, the true appeal of the macaron is in the contrasting textures; the crisp shell and the marshmallowy interior, and the even softer filling. Both macarons fit the bill, although if forced to choose, I'd probably have to go with the Paulette macarons....but only if forced.

May 2009 be even more delicious.

Paulette
9466 Charleville Boulevard at Beverly Drive
Beverly Hills, CA 90212

La Maison du Chocolat
30 Rockefeller Center
New York, NY 10020