Sunday, November 29, 2009

Thanksgiving 2009

DSC_1422

Well, I hope you all had a good Thanksgiving! I checked my archives and apparently last year I was so overcome by turkey that I did not write anything about the meal. (Actually, what really happened is that we went to Charleston right after T-day last year, and I was overcome by South of the Border along the way.) Anyway, enough digression, you can probably guess what my brother (making his first guest appearance here--maybe I should tell him...) is doing in the photo above--yes, that's right! Setting up the fryer for our 3-year-running deep fried turkey tradition. I mean, brined turkey is pretty great, but it's got nothing on the deep fried version. But before we got to that point, there was a lot of prepping of the side dishes...

DSC_1371

Like chopping celery and onions for the sausage stuffing...the one downside to deep fried turkey is that you can't really stuff it. Boo. Small sacrifice though!

DSC_1427

And here's the stuffing after being packed into a casserole and baked with a splash of turkey broth over it. Not as good as last year's (a bit dry), but, pretty good anyway.

DSC_1396

Of course, we had to have cranberry sauce....I love the colors and am always tempted to eat one uncooked because it looks so pretty. After one, I am cured of that particular temptation!

DSC_1429

My recipe (such as it is) is super simple--washed cranberries go into a pot with a few spoonfuls of sugar, grated orange zest, and the juice of an orange. Also a splash of water (but not much!). Cook until the berries pop and taste to see if you want more sugar. I like mine mostly tart. And isn't it a gorgeous color? (You'll notice my book in the corner there--I was reading A Suitable Boy while waiting for various things to cook.)

DSC_1435

We also roasted up some red potatoes and sweet potatoes, which are always good. I didn't get a photo of the finished potatoes or of the brussels sprouts, which I boiled and then glazed with butter and soy sauce, because by now we were almost ready to eat, the sun had gone down, and the lighting sucked. Also, I was ravenous by now! But let's back up about an hour and go out to where the main action was going on.

DSC_1425

Lots of peanut oil coming up to temperature. I don't know why I find that Caution Hot warning so funny. I think it's because this pot was sitting over a giant flame, and, you know, self explanatory?

DSC_1430

The turkey rests on this rack with a handle so you can lower it, versus dropping it. Now would be a good time to say that if you are planning on deep-frying a turkey, you should do it outside, probably farther away from your house than where we had the fryer set up. An oven mitt would be a good idea too, as would closed toe shoes (click here to see a photo of my brother frying a turkey in a stylish Doraemon glove a few years ago). Every year you hear about people burning their garages (or houses!) down--seriously. Don't do this inside a building!

DSC_1434

This is about 5 minutes in, and you can see the hook I was talking about earlier.

DSC_1438

Alright, I didn't get the greatest photo of the whole turkey because it was dark by the time it was done (damn these early sunsets!). But here is a closeup of the yummy, crispy skin (and you can click the link to see the whole bird). Surprisingly, deep fried turkey is not greasy at all, and it is my favorite way to eat it now. Hm, I just realized that I also did not get a photo of the gravy. Oh well, it wasn't that exciting, trust me.

DSC_1404

And of course, we had dessert! This might be the first Thanksgiving I've ever had with no pie, but my brother found a recipe for Apple Bread Pudding over at Smitten Kitchen. I sort of wish I had also made a pie, but no doubt my scale will be happy I did not.

DSC_1418

And here's the bread pudding out of the oven. I think it could have used slightly more custard (I didn't do the measuring, just the apple chopping) but admittedly, I like my pudding very custardy. Nice flavor, though! (And nice afternoon sunshine.)

Needless to say, we (or at least I) ate more than I should have. But it was sooo good. It was a fairly low key one for us this year, so some of the other stuff I had planned to make (pie! celeriac salad!) did not get made...but fortunately I came home with like, half of a turkey so I think maybe I will have to Thanksgiving v.2 in a couple of days. (And if I blog about it, I promise it will be shorter. Yikes! When did I get so long-winded?) Hope yours was good too!

Wednesday, November 25, 2009

Semi-failure: Banana Cake

DSC_1334

I don't think I would describe myself as a particularly picky eater, but I AM when it comes to bananas. I like bananas best when they're still a little green--any hint of brown, and I won't eat it. I don't like the texture of bananas when they're fully ripe. However, since my Superhero Superpower is "forgetting things," sometimes I end up with a bunch of freckled, DEFINITELY too ripe bananas lounging around on the windowsill where I put them on Tuesday. Whoops! Fortunately, even if I don't like eating ripe bananas, these were just right for baking, and I do love me some banana bread--or, in this case, cake!

DSC_1335

I used Pichet Ong's recipe from The Sweet Spot (hey, my first ever actual blog post was about the sweet potato doughnuts from the same book!) for banana cake. Of course, the actual recipe uses baby bananas, and I used regular ones. I can't decide if this substitution was the cause of my not-quite-successful cake, or if there was maybe a bit too much baking soda in the recipe, or if maybe I should not have used a round pan (the recipe calls for a loaf pan). The unbaked batter was nice and fluffy and smelled lovely, though!

DSC_1336

Aaaand, this is what it looked like about 5 minutes out of the oven. Immediately out of the oven, it was well risen and springy (and smelled fantastic), but it started collapsing almost right away. And despite the clean toothpick that I pulled out of it, it felt wobbly, almost like it wasn't baked all the way through. I let it cool and cut into it, and while it is not the prettiest cake I've ever made, it is a pretty tasty one. It's lighter and fluffier than banana bread, but not as light as some other banana cakes I've tried. I'm going to give this one another try, so no recipe for the time being.

For those of you who are celebrating, I hope you have a happy Thanksgiving! And for those of you who aren't, happy Thursday! I'm sure there will be lots of photos to come (we are deep-frying a turkey again this year, woohoo).

Monday, November 23, 2009

Kevin Geeks Out About...Dummy Deaths!

DSC_1328

Well, I was promised cupcakes, and I got cupcakes! These were made by Lisa Beebe for Kevin Geeks Out About Dummy Deaths at the 92nd St. Y in Tribeca on Friday. They are cute in a demented kind of way, aren't they? (There are many more (and better) photos of dummy death themed cupcakes at Lisa's Flickr. And also check out her Vincent Price cupcakes! Hee.) I am only sad that I did not get to say hello to her.

Kevin Geeks Out

And here is Kevin Maher, the brains behind the Kevin Geeks Out series...you might be wondering what on earth Kevin Geeks Out About Dummy Deaths would be about, and I kind of was too, but it was exactly what it sounded like--a compilation of clips featuring dummies and mannequins (and not always of the human variety!) meeting their untimely, frequently grisly demises. It was quite eye-opening (particularly the clip from Ricco the Mean Machine, which I am 100% sure I will never watch). Anyway, it was a great time and we also got to meet and chat with the Flying Maciste Brothers, the co-hosts of the event.

So, dummy deaths, cupcakes, beer, and friend time. Really, what else can I ask for on a Friday night?

*Edited to add: Better writeup about the actual film clips can be found over at Love Train for the Tenebrous Empire.

Friday, November 20, 2009

Another CSA Post

DSC_1305

Boy, this has been the week from hell--I can't even believe I finally made it to Friday. Yesterday was the third to last CSA pickup of the season and it was one of the heaviest! I should have brought stronger bags--every available bag I had was crammed with potatoes, sweet potatoes (so good), cauliflower, celeriac (I've never even seen celeriac before!), onions, butternut squash (yay!), and a giant bag of these carrots. Look at how crazy this one is!

DSC_1309

Siamese carrot! I have plans for most of the vegetables already (and definitely going to be using some of these for Thanksgiving next week) but I have no idea what to do with the celeriac. I'm guessing Google or the Joy of Cooking will come to the rescue, though.

DSC_1240

And speaking of the CSA, a short while ago I came across this very interesting blog,Grapes and Greens, and specifically this post, all about Deborah's experience with the CSA. I was pretty tickled to recognize the site where I also pick up my veggies (although by the time I make it there, it's dark!). I was even MORE tickled to see the recipe for kale and butternut squash gratin that she had posted--I think at that point, I had two or three weeks worth of kale to use up, and this was an easy, delicious way to use up about a week and a half.

Sorry that this is not the greatest photo--I baked it in a really old, banged up dish which is, um, terribly ugly. So you get a closeup of the squash instead! The sweetness of the squash plays off really nicely against the savoriness of the kale and this is a winner in my book. Please visit Grapes and Greens for this recipe (and other ones that look just as good).

Tonight I am going to go watch Kevin Geeks Out About Dummy Deaths with the lovely Tenebrous Kate & Co.--I've been promised mannequins in peril and death dummy themed cupcakes, so, you know, watch this space. Because who doesn't need more cupcakes in their lives? (Oh, right, me.)

HAVE AN EXCELLENT FRIDAY!

Wednesday, November 18, 2009

A Bonus in My CSA Pickup

CSA Bonus

Last week's CSA pickup included this fine cauliflower--sadly, not one of my favorite vegetables. In fact, I generally tend to refer to it as the devil's vegetable. It's just so...WRONG. It looks like a broccoli! But it's not green! What the heck!

Anyway, so I consigned it to the fridge for a while and on Sunday, I finally decided to roast it...and I noticed that I had a little extra hitchhiker.

hitchhiker

Obviously this little guy is a cauliflower afficionado. It seemed a bit sluggish (after all, it had been in the fridge for a week!) but it was still very slowly marching along. I took it outside (with a cauliflower leaf).

And the cauliflower? I have to admit--it's actually not bad, roasted. Apparently there is nothing roasting can't improve. (No photo because it's not that interesting to look at!)

Saturday, November 14, 2009

An apple pie for crust lovers

Apple pie

This post is especially for my coworker friend, who, upon receiving a slice of pie said "Hey are you going to blog about this? Then I'll have eaten something you blogged about!" Plus, the apples I used were picked by her family. So, here you go babe ;)

Anyway, one of my favorite blogs is Baker's Banter, written by the awesome people at King Arthur. A couple of weeks ago I came across this post, which is a step-by-step recipe for making a non-traditional apple pie. This pie is all about the crust. There's a slim layer of apple filling, providing just the right amount of tart sweetness, but the star is definitely the crust. And it should be! Unlike most crusts that I've made, this one incorporates cream cheese and bakes up to be, well, crusty, and flaky and delicious. (Actually, I baked up all of the crust scraps and ate those first. I think honestly, I could happily just cut all the dough into cookies and eat them with no filling at all.)

DSC_1243

How much do I love this recipe? So much that this is my second time baking it in a week. The top picture is my first attempt, which I brought to the office and which elicited this assessment from my coworker: "very very good. Nice caramelization on the bottom and delicious crust to fruit ratio. Crust v. flaky and tasty, crispy. Good amt of sweetness. A winner!"

Have I mentioned that I love my coworkers? Anyway, I made it again today for a potluck I'm going to, and it looks like it's going to be just as tasty--it's just now also slightly better looking. For one thing, I actually rolled the crust into a round instead of a lopsided ellipse.

DSC_1244

For another, I broke out some of these leaf cutters I've had kicking around for years--I don't even remember when I bought them (or hell, *if* I bought them. They might have been a gift.) I am pretty sure I've never used them, though. Anyway, they are easy to use--cut them and then there's a piece inside the cutter that stamps the leaf vein pattern on. Brush the backs with a little bit of milk and apply decoratively (or haphazardly, whatever) to your pie. Then the whole thing is brushed with more milk and sprinkled with coarse sugar.

More Crust Less Filling Pie Take 2

Now you'll notice right away the difference in color between the first and second pies. That's because the lighting in my apartment sucks, and so I have to take all of my photos in my front window. And it's been damned cloudy lately! So, trust me--this one is just as gorgeous and brown. It's just nasty weather out.

DSC_1251

Here's a closer look at some of the leaf cutouts. Pretty, right? I actually have it sitting on a cutting board; I don't own any plates large enough to hold this pie (it's about 10 inches across). And I am not carrying a cake stand on the subway! Anyway, hopefully it'll be well-received, and if not, then I'm going to eat pie for breakfast!

More Crust Less Filling Apple Pie, from Baker's Banter
For the crust:
2 cups all purpose flour
3/4 teaspoon salt
4 ounces cream cheese
10 tablespoons unsalted butter, cold and diced
ice water

To make the crust, combine the flour, salt, and cream cheese in a bowl and beat (either with the paddle attachment of a stand mixer or a hand held mixer) until the cream cheese is broken up and the mixture is crumbly. Add the diced butter bits and cut in until the butter is mostly incorporated. This shouldn't take very long if you're using a stand mixer, and you should have lots of different sized pieces of butter. Don't be too thorough. You definitely want visible pieces of butter left because they will make your dough flaky. Sprinkle two tablespoons of ice water over the dough and toss with a fork until moistened; squeeze a handful to see if the dough will hold together. If not, add a tablespoon more of water at a time; you just want the dough to hold together. Gather into a ball, and divide in half, one piece slightly larger than the other. Wrap in plastic and refrigerate at least half an hour.

For the filling:
2-3 medium sized Fuji apples
1/2 cup granulated sugar
1 teaspoon cinnamon
1 teaspoon ginger
juice from 1/2 a lemon
1 tablespoon butter

When you are ready to bake, preheat the oven to 425 F. Roll out the larger half of the dough to an approximately 11" circle and place on a baking sheet lined with parchment. Trust me--you are definitely going to need the parchment. Peel, core, and halve the apples, then slice then into 1/4" slices crosswise. Toss with lemon juice. Combine the sugar, cinnamon and ginger and spread out evenly over the bottom crust. Arrange the apples on top in concentric rings (you don't HAVE to, but it indulges my OCD side). Dot with the tablespoon of butter (cut into bits). Roll out your second piece of dough, and cut several holes for steam vents--you can use cookie cutters or just cut steam vents free-hand. Depends on how fussy you want to get! Fold into quarters and center it on the apples; unfold! Fold the bottom crust edges over the top crust and press to seal. Brush the entire pie with a little milk and sprinkle sugar (coarse or granulated) over the top. Bake at 425 F for about 15 minutes, then turn the heat down to 375 F and bake for a further 30 minutes, or until the juices are bubbling and the apples are tender. My pie leaked a fair amount of juice, although it did not make the crust soggy. But you'll be glad you put that parchment paper down! Cool for at least an hour, then slice and enjoy.

(Another benefit of this type of thin pie is that you can slice it and eat it like a pizza slice, with your fingers. Convenient!)

Sunday, November 1, 2009

Cream scones and well-travelled jam

DSC_1176

I don't make scones very often. Why, I don't know, because I happen to LOVE scones--especially with lots of clotted cream and jam. I guess it's probably a good thing that I don't make them that often, or I would be wider than I am tall (and likewise, it's a good thing clotted cream is so expensive here, otherwise I am sure I would eat it straight from the jar with a spoon. Not that I do that with anything else, coughcoughnutellacough.)

Anyway, so, I was just thinking about making some no-knead bread but I realized I really wanted some bread RIGHT NOW and not in 18 hours, and as a matter of fact, I didn't even really want to wait 2 or 3 hours. What can I say--sometimes, you just need instant gratification.

DSC_1177

These came together very quickly; my trick for making anything where butter needs to be cut in is to keep my butter in the freezer. Then, when you're putting biscuits, scones, or pie crust together, you just grate the frozen butter on a coarse grater into your flour. Toss, rub a bit with your fingertips, and add liquids. I made these very small (remember my obsession with small, cute things) and cut them with a knife, which is probably why they didn't rise as tall as they should have. But don't they have a lovely golden color?

DSC_1174

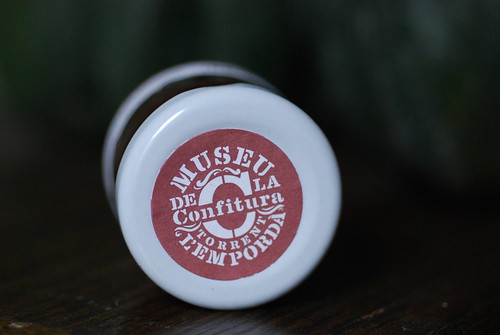
And to go with these scones? Well, I could have used the lingonberry jam that's been kicking around in the back of the fridge for.....actually, I have no idea how long. Whenever the last time I went to Ikea was. But since I didn't want food poisoning wanted something special to go with these delicious scones, I broke into the shmancy jam from the Museo de la Confitura which my work friend was kind enough to bring back from Spain for me. (Have I mentioned already that I love food gifts?) I totally want to go to this museum, by the way.

DSC_1181

Mmmmmmmm. Don't you want to eat one?? Okay, maybe I didn't have any clotted cream lying around, but a hot scone, jam that's not too sugary, and a good cup of tea made for a completely satisfying Sunday morning!

Basic Scones
2 cups all purpose flour
1/4 cup granulated sugar
1 teaspoon salt
2 teaspoons baking powder
1/3 cup butter, frozen
1 egg, lightly beaten
1/2 cup cream (or half-and-half, whatever you have around as long as it's not skim milk)

Preheat oven to 375 F. Whisk together the dry ingredients. Using the largest holes on a box grater, grate the frozen butter directly into the bowl with the dry ingredients. Toss with your fingers, rubbing the mixture briefly through your fingertips (not too much!). Combine the egg and cream in a small cup and then pour into the dry ingredients. Stir only until mostly combined; it is perfectly okay to still have some dry flour. Turn the mixture out onto a clean countertop and knead no more than 4 or 5 times, just to bring everything together. Pat out to 3/4" thick. Cut (with cutters or a sharp knife) into approximately 2" rounds or squares. Place on a parchment lined baking sheet, and brush the tops with a bit of cream or egg wash for a nice brown shine. Bake for 15 minutes, or until golden brown. Cool briefly before splitting and serving with cream, butter, jam, nutella, condensed milk, honey....whatever floats your boat.