Sunday, March 1, 2009

Green tea ice cream

DSC_0036,


In baking, sometimes even a disaster can still have a happy ending. I was going to turn those horribly ugly cupcakes into cake crumbs for future use, but it just so happened that last week I tried a recipe for homemade green tea ice cream...and then I promptly forgot about it in the freezer. (Forgetting things is a seriously bad habit of mine.) But actually, it's good that I forgot about it, because now I can have (trimmed up) chocolate cake and green tea ice cream. Hey, all right!

This recipe is from Elizabeth Andoh's Japanese cookbook, Washoku; it's a really terrific resource for homestyle Japanese recipes. It is about as simple as you can get for ice cream (no need for an ice cream maker!) and as long as you have good quality tea, it's really delicious. It's not as creamy as the ice cream I buy, but I also suspect that it's a lot less caloric. And if you are more diligent about whipping it than I was, it'll be smoother.

Green Tea Ice Cream
1/3 cup sugar
1/3 cup water
1/2 teaspoon mirin
2 teaspoons matcha
1/2 cup whole milk
1/2 cup half-and-half

In a small saucepan, combine the sugar and water. Stir the mixture over low heat to melt the sugar and continue to simmer for about 5 minutes, or until syrupy. Add the mirin (which I omitted), stir, and remove the pan from the heat. In a small bowl, combine 1 tablespoon of the warm syrup and matcha and stir until dissolved. Return this sweet tea concentrate to the saucepan and stir until completely blended. To retain optimal aroma and ensure an intense jade color, do not reheat the mixture. Stir in the milk and half-and-half and mix thoroughly.

Pour the tea and milk mixture into a flat, shallow, freezer-safe container. Tap the container gently on a countertop to force out any air bubbles. Cover and freeze for 1 1/2 hours or until nearly firm. With a handheld mixer, whip the mixture vigorously in a deep bowl. Return the mixture to the same container, re-cover, and freeze again for another 45 minutes, or until firm throughout. Repeat the whipping step one more time to achieve a silkier texture. Makes about 1 pint (unless you keep tasting it).

Saturday, February 28, 2009

Where, oh where has my baking-fu gone?

P1020919

Last week I asked my coworker what he wanted for his birthday, coffee crunch bars, or chocolate cupcakes. I don't think he was really paying attention (this happens a lot since I routinely turn around to inform him of whatever song is stuck in my head, or solicit his opinion on what to eat for lunch. Sometimes, I just turn around and tell him I'm really, really bored. He is kind of long suffering.) but after some more prodding on my part, he settled on coffee crunch bars. Okay, maybe I was pushing them a little since I had just read the recipe in February's issue of Bon Appetit.

P1020918

So, the other night, I got out all my ingredients, chopped up some good chocolate (to replace the chocolate chips), whipped up the recipe (very quick, very simple) and consigned it to the oven. By the way, this smells absolutely phenomenal while it's baking. Now, I don't exactly know what was going through my mind--I mean, the recipe is called Coffee CRUNCH Bars, but for some reason, I had it in my head that they would be kind of soft, like blondies maybe. I sliced them into bars while they were still somewhat pliable, but when they cooled--ooh, man. I almost cracked a couple of teeth! I can only attribute this to the fact that I overbaked them, because these are almost like biscotti. And although they look kind of good, especially in cross section, I did not feel they were up to my usual standards. So, the next night...I decided to make cupcakes, using a recipe that I had used many, many, many times before. And this is what happened:

Cupcake fail!

FRICKIN' FRACKIN' !#$!!%$$@!#$^^&#%%^$!!!!!!!! I guess I overfilled the cups, but oh gosh! Cupcake fail! Anyway, I made a half hearted attempt to cut around the overflow, thinking I could hide the ugliness under ganache, but no. It was not to be. I brought the coffee crunch bars in, instead. And you know what? With a quick dip in tea or coffee...they are pretty good. My coworker ate 6, so I guess they pass! If you try this recipe, don't overbake them!

Coffee Crunch Bars, from Feb 2009 Bon Appetit
2 cups all purpose flour
1/2 teaspoon baking powder
1/4 teaspoon salt
1 cup plus 2 tablespoons butter, room temperature
1 1/4 cups dark brown sugar
2 tablespoons espresso powder
1/2 teaspoon almond extract
1 cup semisweet chips
1/2 cup sliced almonds

Preheat oven to 325. Whisk first 3 ingredients to blend. Using electric mixer, beat butter and sugar in another medium bowl until blended, about 2 minutes. add espress powder and almond extract; beat 1 minute. Stir in flour mixture in 3 additions, mixing until just absorbed. Stir in chocolate chips and almonds. Turn dough out onto ungreased rimmed baking sheet. Using hands, press dough into 12 inch square. Pierce all over with fork at 1 inch intervals. Bake until edges are lightly browned and beginning to crisp, 45 to 50 minutes. Cool on sheet 1 minute. Cut into 48 bars and transfer immediately to rack to cool.

Thursday, February 19, 2009

Bad blogger!

Cedric the Dino


I know, I have gone MIA again. I've been kind of stressed out with my Real Job. And it's not even like I haven't been doing any baking or cooking (or eating in general, hah), I just haven't been motivated to document any of it. Which is a shame, because we made a really lovely cioppino with more No-Knead Bread for Valentine's Day...and I made a huge batch of scallion pancakes on my day off (a recipe I should definitely share).

Well, hopefully things will calm down soon. In the meantime, here is my newest office companion, Cedric the Dinosaur. He comes from far-away-Canada, enjoys patrolling my desk to keep nosy co-workers out of my drawers, and likes to analyze client statements when I'm not looking. I think he might be planning on swiping all of the TARP funds and starting a new life on Tropical Dino Island.

Tuesday, February 3, 2009

Chinese New Year Parade, 2009

160-2

Nope, there is no food in this post--but there are cute kids and lions and more confetti than you can shake a stick at! I finally managed to get myself to the Chinese New Year Parade in Chinatown this year and had a blast. I DID get there almost 2 hours early, thanks to some faulty information on the website (it said it started at noon!) but the upside to that is that I had a prime spot to watch from.

Confetti shower

I didn't wait by myself for very long, either--pretty soon, there was a decent crowd, most of whom were entertaining themselves (and each other) by shooting off confetti cannons.

144

This kiddo made his own lion dance. It was a really beautiful day (45 degrees, that's almost t-shirt and shorts weather!) and there were plenty of people to watch. Still, I was getting kind of antsy when I finally heard drums approaching...

148

First, the veterans. See how much confetti there is already?

169

And then, the first of the lions! I was pretty excited at this point...but THEN the father of the adorable kid next to me handed me a hong bao so I could FEED the lions.

Feeding the lions

Here is said adorable kid, giving the lion a hong bao. They "eat" the packets (which contain small donations); this one then did a little dance for us. Lots of floats went by (one sponsored by Foxwoods, go figure, hah!) but my favorites were definitely the lions and dragons. I recently got a nice email from the company that makes those lions--check out their website. There is some gorgeous stuff there, if you should find yourself in need of a lion or two :).

196-2

Then the Shaolin kungfu students came through and did a short performance. Man, they were impressive.

243

And my favorite person in the parade. He's totally giving me the eye, right?

248

The dragon--a proper, multi-person dragon! None of this single person tomfoolery!

275

One more touch of the lion, for luck....

Happy Niu Year

And here comes the niu year, riding in on a bicycle. HAH!! (The full photo set is here.)

Happy Year of the Ox to all!

Tuesday, January 27, 2009

CNY Pineapple Tarts, Step-by-step

161

Well, as promised previously, here is an in-detail post on the pineapple tarts I made for Chinese New Year. I think I originally saw a posting on them on Pigpig's Corner and then came across them again in an article in (of all places) the Wall Street Journal. They looked so good--how could I resist?

These types of pineapple tarts (or balls, as I was calling them until someone at work made me start referring to them as tarts) are not a tradition in my family (judging from the blogs I read while looking for recipes, they seem primarily to be popular in Singapore and Malaysia); I've eaten pineapple shortcakes before, but these are totally different in texture. I cobbled a recipe together from various sources, although the pastry dough is primarily taken from Masak-masak's post.

Anyway enough rambling on with the recipe!

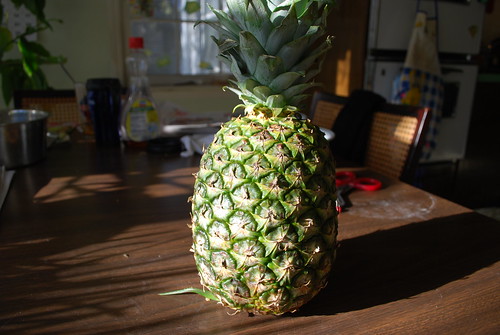
Step 1: Get yourself a pineapple. (See above!)

164

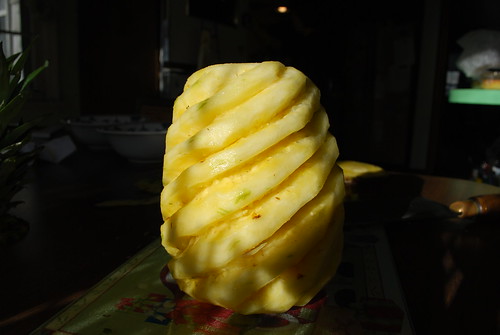
Step 2: Make pineapple naked and remove eyes. I only had a cleaver at my disposal, but I recommend using something smaller, like a paring knife. Remove core, and roughly chop the pineapple into chunks.

165

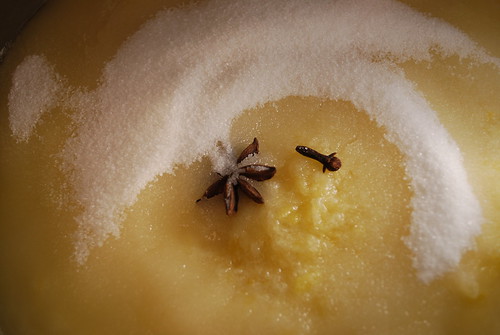
Step 3: Throw pineapple chunks into food processor. Blend until mostly smooth, then transfer puree to a heavy bottomed pot, and add about a cup of sugar, a star anise, and a clove. You may need more or less sugar depending on how sweet your pineapple is. Simmer for a long, long time. A LONG time. Stir frequently. Keep simmering until the puree has turned into an amber, sticky jam.

169

Step 4: After jam has cooled, roll it into balls approximately the size of a marble. Resist the urge to eat the jam straight up.

170

Step 5: Make pastry. (See bottom of post for recipe.) Roll pastry into slightly larger balls. Curse when you realize the number of pineapple balls doesn't correspond with the number of pastry balls.

Step 6: MAGIC. Okay, really, I just didn't take a picture of the filling process because it requires two hands. Basically you want to take your ball of dough, flatten it out with your fingers (try to make the edges thinner and the center thicker, like you would for a dumpling) and then seal a ball of pineapple jam inside. Try to keep the jam on the inside.

173

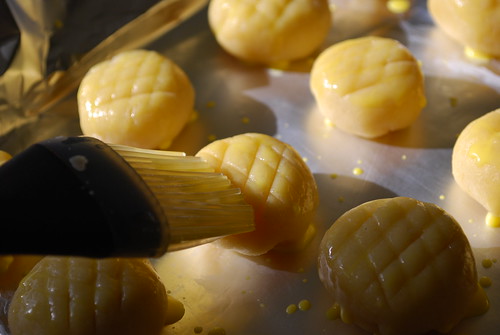
Step 7: If you aren't tired of pineapple tarts, use your knife to score a pattern on top of each one. Brush with an egg yolk glaze. (You should have your oven preheated to 375 degrees F.)

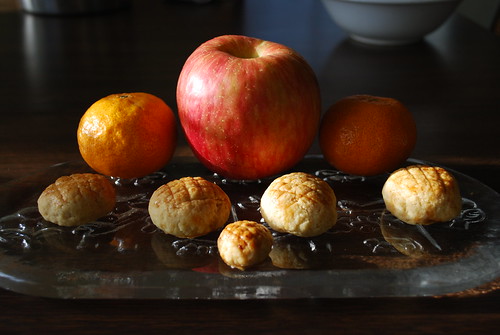
Big pineapple tart and chibi-pineapple tart

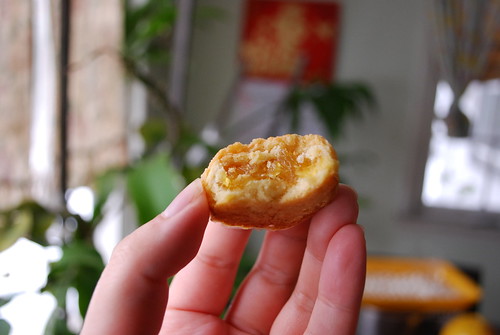
Step 8: About 20 minutes later, pineapple tarts! Admire their crackly brown gorgeousness. Resist urge to bite into one immediately, cause that jam gets really hot. Take lots of photos while they cool.

193

Step 9: Enjoy! Enjoy it fully, because they won't be back for a whole year :)

Pineapple tart dough
3 cups all purpose flour
1/4 cup granulated sugar
1/2 teaspoon salt
2 sticks butter, cold and chopped into chunks
1 whole egg plus 1 egg yolk

Combine flour, sugar, and salt in the bowl of a food processor and pulse briefly to combine. Add cold butter and pulse again until the mixture is the texture of coarse cornmeal. While the machine is running, add in the egg and egg yolk. Pulse until the dough starts to form clumps. Dump onto a clean work surface and knead briefly until smooth.

Monday, January 26, 2009

Gong xi fa cai!

Gong xi fa cai!


It's the first day of the new year (the year of the Ox) and it's bright and sunny and gorgeous out so we are heading down to Chinatown to see some of the festivities--so this is a fly-by posting. More later, including a recipe for these pineapple tarts and a description of our delicious 10 course New Year's Eve dinner.

Xing nian kuai le!

Sunday, January 18, 2009

Late adopter--No Knead Bread

163

Several years ago, I made not making resolutions my resolution for New Year's. (Well, with the exception of my ongoing "be more positive!" drive.) Anyway, I didn't exactly make a resolution this year, but I did kind of vow to get more into yeast baking this year. I'm not really sure why I hadn't been doing any yeast baking at all in the last few years--I guess mostly because of the time factor (I like instant gratification) and the fact that my brother is a very talented bread baker. I mean, why bother when I can eat his delicious roasted tomato focaccia?

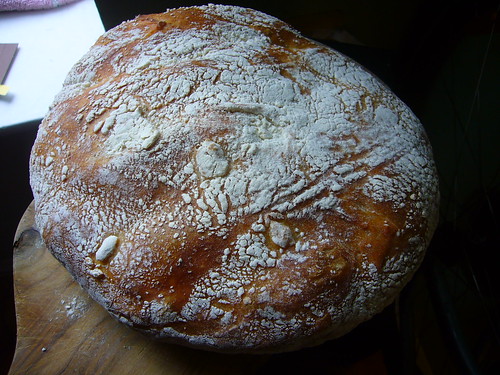
Well, be that as it may, what could be a better bread to start off with than the completely no-fuss, completely famous, blogged to death No Knead Bread?* After all, I'm only two years late jumping on the bandwagon. The good thing about being this late to the party is that I had ample evidence that this recipe did, in fact, work--and no kidding! It really is the simplest yeast bread I've ever tried--dump a minimal number of ingredients in a bowl, stir, cover, ignore for the next 20 hours (I stirred it up and let it sit overnight), remember the rising dough somewhere around hour 24, shape (very haphazardly and with great mess), despair over getting it into a ball, fling into hot pan, consign to oven with crossed fingers--and hey, presto! The best textured bread I've ever baked by myself!

169

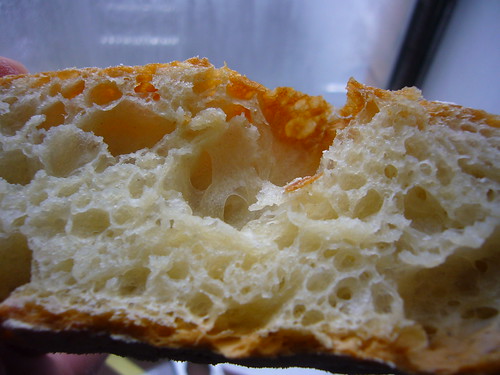
I mean, look at that slice. It's a far cry from the dense brick that my last loaf of bread turned out to be. And I couldn't believe that it ended up shaped so nicely, despite the fact that I literally just dumped the entire lump of dough into my pan (I just could not get it to form a ball) willy-nilly. The crust is delightfully...crusty, almost shattering when you bite into it, and the interior is nice and tender, but with a nice resistance. Basically, I have no complaints, only praise for this recipe, and if you're just starting to experiment with yeast baking, I highly recommend this.

*Okay, I guess the actual first yeast recipe I made this year was cinnamon rolls, but they were not very pretty.